Sunday, May 29, 2016

KonMari method of Tidying up

Let me start by mentioning, it is not that I live in a mess, it is just that I had clothes in every closet of the house. So when it comes time to pick clothes to wear, I was all over the place.
I didn't even know if it would apply to any of my interest, but got the audio version from the library. I was so captivated, I finished listening to the entire book over 2 days.
And right after, I had such an urge to tidy up.
I started as the book suggests with clothes. I removed all my clothes, all over the house and put them all together. They made a huge heap on the entire bed and that itself is overwhelming to know I had so many clothes. At first, it is a little hard to figure out what "sparks joy". Then I think, I could always wear it in the studio, where clothes get messy. But after going through the entire pile of clothes, I realized, I had enough brand new T-shirts for which were not perfect for outwear but great for the lounge wear or the studio. 
I tossed out 2 HUGE bags of clothes. They went to the thrift store. Many brand new clothes, which were gifted and never fit. And many which fit once and I hoped would fit again. Keep dreaming. Also if I did loose weight wouldn't I want new clothes, rather than old clothes which fit me once upon a time? Made sense to me and out they went.
All the discarding took 2 hours.
Then went through and sorted clothes which I wear everyday when I get out, special occasions. Clothes that I wore at my shows, Clothes for home and clothes for studio. Discarded some more.
Finally came down to six small pull out drawers. I didn't have a drawer system in my closet before. Got this one from IKEA and it was perfect. Folded clothes as per the KonMari method. This took another hour. One drawer is still empty and two are half full.
As much as one likes to see before and after pictures.... I didn't take the before picture, because I really didn't want any memory of it. So here you see just the AFTER picture. And it really didn't take as long as I thought it would.
Next I tackle books!

Thursday, May 19, 2016

More good news on the Blanket pattern

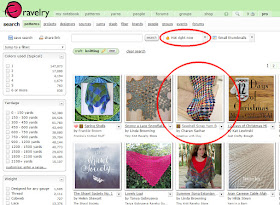
On Day 2 of releasing the Seashell Sock Yarn Blanket pattern, it has become really popular and was #3 in the "Hot Right Now" list on ravelry.
To celebrate, here is a 20% OFF Coupon Code: FIRST , valid for the month of May 2016.
Buy the pattern , and start collecting your sock yarn
I am also going to be teaching a class on May 24th at Makers Mercantile in Kent, WA 5:30pm - 8:00pm which will cover, making the yarn for the blanket from scraps and the pattern.
Register here http://www.makersmercantile.com/scrap-blanket-knitting-class-with-charan-sachar.html

Wednesday, May 18, 2016

Scrap Sock Yarn Blanket

After knitting now for 2 years or so, I thought it was time to write a knitting pattern. This one started with the idea of using scraps of sock yarn to make a blanket. Yes, I know there are many such amazing and simple patterns online and I tried my hand at a few. Each one is great and has its own charm. I am not ranting anything against them, but there were some things which hindered my progress on those.

Firstly, I was stumbling on choosing the right colors and have them evenly distributed through out the blanket.
Like other scrap yarn blanket, I could plan and distribute the different colors evenly, but then there is all that seaming to do at the end.
And you know there are always those colors which you are really not crazy about. Your eye would always go directly to that square and haunt you.
Also each square from a yarn, gets predictable after a while and the project might loose steam.
And like any blanket project, including mine... it takes time.

So, I wanted to knit up this blanket which would keep the excitement going. Using every bit of yarn and making the yarn keep changing, avoid weaving in the ends and make every section pop.

Here comes my Seashell Scrap Yarn blanket. The pattern can be purchased here


Let me tell you majority of the work for this blanket is done before even starting to knit. What you work on is creating this colorful yarn cake, using every small bit of yarn from your scraps. All bits are joined by magic knots.


The pattern emphasizes on an easy way to categorize your yarns based on color tones and making colorful yarn cakes which can be used for similar projects. You could make a simple striped garter blanket using these colorful yarn cakes.


Lots of simple show rows make the shells. Short rows in this pattern involve just turning work and working the stitches, leaving a hole. These holes make a nice border around the shells making them pop.