Showing posts with label studio. Show all posts

Monday, September 23, 2013

Studio organized... progress

It has been a busy week and half, reorganizing the studio space. As you can see in my previous post the studio was getting really cluttered and I was completely out of horizontal space. Things always had to be constantly moved around and a shelf could be used for just one thing, storing handbuilt pieces in progress, decorating or glazing.

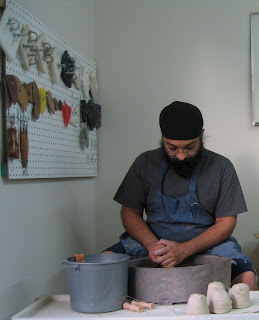
One significant change was moving the kiln in the garage. With the garage in my working studio space, I often lost a day or two of work during a week because it got too hot in the studio. Plus it takes up so much room. Now with the kiln gone I was not only able to put another set of shelves, but also add another working table. Now with more that one shelf I don't have to move things around that much.


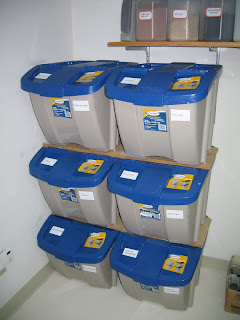
The garage space also got a uplift. The thing that bothered me most about it was the packing peanut dispenser which hung in the middle of the garage. Cannot live without it but at the same time it shrunk my space in half. I modified the shape of it and fortunately it fit snugly in the dead corner between the garage door rail and the wall and could also go higher up. And those Ikea shelves work great for me to sort out wholesale orders.


To move the kiln in the garage, I did have to have electric work done. Got two outlets in the garage for another kiln in the future and added other power outlets too. Of course, got a lot of light added as well. Now with the kiln in the garage, I don't have to worry about my studio working schedule. I can make things when I want to rather than waiting for my studio to cool down.

And cleaning out the garage and the studio, did generate stuff that was taken to the Goodwill, distributed to other artist friends. But there was significant trash which was taken to the dump. Any guesses on how much the trash weighed?

Monday, September 2, 2013

Studio needs to be cleaned and reorganized

To have a good functioning pottery studio, one needs space. That would be true for almost any artist. The more space we have the better.
But what do you do when you don't have the space? Well, you learn to efficiently use every inch of space that you have. And it is very essential, to clean out the studio and get rid of stuff more often.
I know of some artist who have huge spaces. I am not going to name any names, but I am jealous. Some of them have their space organized well, but most of them can get away with just spreading around which also results in collection of stuff that never sees the light of day.
So sometimes I feel that just having the big space might not be the perfect solution, though I will take it if I got it.
For some of you who have been to my studio know that I work in a fairly small space for he amount of work that I make. My studio is the family room at the ground level of our home and it is ~350 sq ft and also houses the kiln in it. Recently with constant firing and struggling with covering things because they would dry sooner than I want and with the increased production, some serious changes need to be made. In addition to this space I do use a one-car garage as well to store inventory, packing orders, and all the other misc stuff.
Here are some pictures and you can see it is pretty tight and always a challenge for more horizontal space. Well, I am making some changes and will post pictures of what happens later. The kiln will be moving to the garage and more shelving added to the studio. Garage space will be organized a lot better.... hopefully.


How big is your studio space???

Wednesday, March 20, 2013

Moravian Pottery and Tile works


When I went to Philadelphia for the Buyers Market Show in February I made it a point to have an additional day to visit the Moravian Pottery and Tile works in Doylestown, PA. It is a 1.5 hour train ride with 1/2 hour walk from the train station to the studio, but worth every minute and much more.
The Moravian Pottery & Tile Works (6)
Seeing the video of the history of how these tiles acme about was great with so much great insight to some simple processes that still in use there.
Check out the number of tiles a worker had to produce in a day. That is a lot of freaking tiles!!!
The Moravian Pottery & Tile Works (4)
The Moravian Pottery & Tile Works (3)
It was great to get an in depth look into process with one of the artists there (Eric, don't recall his last name). He was grateful to answer all my questions and also gave me a ride back to the train station in the freezing rain. I was amazed to see that the tiles were all physically pressed by hand with simple tools till date and he mentioned that the tile press was used for mostly open faced tiles. A very basic tile press and plans of making one are in Frank Giorgini's book "Handmade Tiles"
The Moravian Pottery & Tile Works (2)
The Moravian Pottery & Tile Works (1)
The Moravian Pottery & Tile Works (7)
This I think was one of the most genius things I saw there. Their boards for storing tiles during making, decorating and glazing was so simple. Just a board with small 1x2s attached at the end that just stack and make a cool inbuilt shelving system. They have been using this system for years and some of those boards are really old. Some of the simplest ideas are the greatest.
Of course going there has me inspired t do some tile work. I have had it at the back of my mind for years, but going to this place has really got me thinking again. I have already started working on some prototypes, so hopefully I will have new products during the summer shows.

What places or workplaces have you visited that have inspired you?

blogger email facebook pinterest twitter youtube

Monday, April 9, 2012

Extruder die storage and Kiln posts storage


I have a pretty small studio space as some of you who visited my studio must have noticed. I try to make the most of every inch of space I have.
Early this year I visited Barbara Dunshee's studio who is just great at managing here studio space for teaching pottery in her basement studio. What she shared with me were here IKEA CD shelves used as storage for kiln posts. I loved the idea and was on Craigslist hunting for them right away. Found two of them for $30.
With adjustable shelves these are perfect for arranging kiln posts by height and they work great for storing all my extruder dies as well. Make sure to attach them to the wall so they don't fall over. And they have such a small foot print fitting perfectly in the dead corner behind the kiln.

What are your favorite storage solutions in your studio? Comment away.

Monday, February 20, 2012

Decorative Butter Dishes

I have been making decorative butter dishes for a few years now and I am always thrilled to decorate them with unique patterns. Because of their time consuming nature, I usually made 12 at a time. This time I decided to challenge myself and make 30 of them. Most of these are for wholesale orders, so I have been a busy bee.

I made all different patterns and had to really scratch my head on these.

Few things I realized from making larger quantities at one time...
  • You increase your efficiency. For example, you pick up one tool and do the same step on all the butter dishes. Rather than picking up and putting down 10 tools for each piece. This saves a lot of time.
  • Develope quicker ways to do the same thing. I made a new tool which helps me score and slip. More on that in another post.
  • And because I wanted different designs on all butter dishes, I came up with some really cool new patterns.
  • And most of all your hand developes a memory, just like playing the piano which makes things go a lot faster and your work will continue to improve.
Do share your insights on what you have learnt working in your studio.
 

Sunday, January 9, 2011

Try Try Try.. till you succeed

So I woke up Christmas eve with this idea in my head... pillow shape bowls. I did make some wall clocks with my pillow shape extruder die and they sold well over the Christmas holidays. Now I wanted to make something else. The basic idea was make a long pillow form, cut out a hole and slump in a slab and attach the edges. Done!

I wish it was as simple as that. :) I spent all of Christmas Eve and Christmas day trying to figure out how to make these bowls. I went through 30+ pounds of clay and made 7 or 8 of these. The difficult part was making a clean piece with the bowl portion having a clean edge.

In the picture below you can see the progression of the last five from left to right. For the first piece, I cut the hole in the pillow shape and took a bigger slab of clay to slump it in. The edges of the pillow collapsed and after a lot of fussing finished it but I wasn't happy. The next one I tried a different shape cut out to make it easier to slump the clay in and that was not as clean as I wanted.
In the third I used the cut out itself, flipped it over and atached it. It attached fairly cleanly but had no volume. It would be a bowl that held nothing. Which made me think that the piece of clay being slumped needs to be a perfect match in dimension.
So that is what I did. I took precise measurement of the cut out. Increased it by 1/2 inch all around and it slumped and fit in a lot better.


Making anything new is a process, but it is a process I enjoy. Never fear to experiment and see what direction it can take you. In the picture below you can see how the edges got cleaner with every piece.

I did toss out the first three pieces too and decorated just the final two with my signature slip decoration. That just gave them the WOW factor!
Here are pictures of another one I completed. Would make a great serving bowl for nuts and candy.

Wish everyone a very Happy New Year! And with the New Year make a lot of New work!

Thursday, May 28, 2009

Studio space

I have met very few artists who would claim that they have more studio space than they need. We are always struggling for more room and the space keeps shrinking.
Of course it is not possible for us to move to bigger space every time we run out of room, ….though that would be awesome! Like many other artists I try my best to get the maximum utilization of space that I have. Very often I convert a part of my space for another stage of the process as well.

Here is a glimpse in my studio
Using dead space under by slab roller table to store my glazes and having everything on wheels to make moving things easy.

Tools arranged on a pegboard with hooks for easy access when I am throwing on the wheel.
Stackable large storage bins to store glaze chemicals.
Clearly labeled chemicals in clear containers.
This is how my regular work space transforms in a photo studio.
Do comment with your secrets to make the most of your space.

Saturday, March 14, 2009

Studio Floor

Clay is messy to work with, but all us potters love the medium. It can be hard to clean clay dust in a studio, but it should be cleaned as it isn't good for your lungs.
With all the work involved with making pots, decorating, firing, taking pictures, selling, shipping etc etc... there is little time left for cleaning the studio. when I set up my studio, I wanted to have a floor that was easy to clean. I had a concrete floor and I painted it with epoxy paint after etching and priming it. The result is really nice. You can see pictures of the process here.

Cleaning it is a breeze. To make sure I clean it on a regular basis, I clean the floor every time I do a glaze firing. Never Sweep! The clay dust would just rise up in the air. I just take a wet mop and move it around the floor. Then I take a squeegee and collect the messy water together and just pick it up with a big sponge. Done!

It has been more than 4 years since I painted my studio floor and the paint is still doing well. Only a few chips in one area where I tend to drop tools often. :)

I have been contacted by other potters too asking me what I have done with the floor. Recently I was contacted by Miri Hardy who lives in Puerto Rico. After some discussions, she finished her floor with soy based concrete stain and her floors look beautiful. Like a the surface of a terra cotta pot. It is always nice to see an artist's workspace. If you have links to pictures of your workspaces, put links in the comments. Along with me I am sure other artists would like to see as well. Here is my studio tour.

LinkWithin

Related Posts Plugin for WordPress, Blogger...